

| 일 | 월 | 화 | 수 | 목 | 금 | 토 |
|---|---|---|---|---|---|---|
| 1 | 2 | 3 | ||||
| 4 | 5 | 6 | 7 | 8 | 9 | 10 |
| 11 | 12 | 13 | 14 | 15 | 16 | 17 |
| 18 | 19 | 20 | 21 | 22 | 23 | 24 |
| 25 | 26 | 27 | 28 | 29 | 30 | 31 |
Tags
- ChatGPT
- 오늘의역사
- 생성AI
- 파이썬
- Gemini
- 명언
- 명언모음
- 명상명언
- 장자명언
- kotlin
- Android
- 공부집중
- FSM
- androidx
- Freesound
- Coroutine
- Flutter
- javascript
- jetpack compose
- 소울칼리버6
- ASMR
- Firebase
- Linux
- DART
- 좋은글필사하기
- 오픈소스
- 코틀린
- 이모지메모
- 명심보감
- gemini-cli
Archives
- Today
- Total
Vintage appMaker의 Tech Blog
[Flutter] Draggable Floating 위젯 예제 본문
Source code or Tip/Flutter & Dart
[Flutter] Draggable Floating 위젯 예제
VintageappMaker 2022. 7. 15. 21:38Flutter 앱에서 드래그 가능한 떠다니는 위젯을 구현할 필요가 있어 검색을 했더니
아주 깔끔한 포스팅이 있었다.
Draggable Floating Action Button In Flutter
Learn How to Creating a Draggable Floating Action Button In Your Flutter Apps
medium.flutterdevs.com
위의 포스팅으로 구현을 해도 되지만, pub.dev에 비슷한 기능을 하는 패키지가 등록되어 있다.
floating_draggable_widget | Flutter Package
A flutter package for floating draggable widget. By this package a developer can implement a widget which can be draggable inside the screen freely.
pub.dev
설치방법은 다음과 같다.
콘솔에서
flutter pub add floating_draggable_widget

또는 pubspec.yaml에 직접

dependencies:
  floating_draggable_widget: ^2.0.0
이를 이용하면 쉽게 드래그가 가능한 floating widget을 구현할 수 있다.
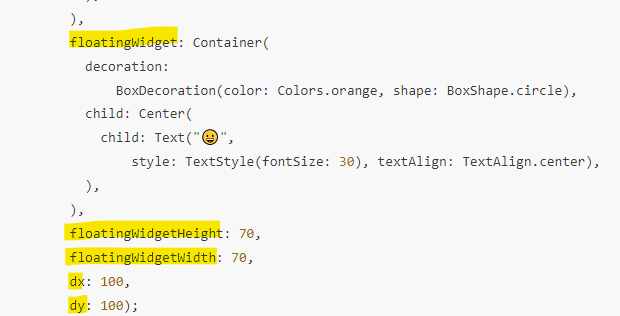
사용법은 컨테이너가 될 위젯을 아래와 같이 FloatingDraggableWidget으로 둘러싸고

floatingWidget에 floating할 위젯을 구현하면 된다. 그리고 floatingWidgetHeight, floatingWidgetWidth로 크기를 설정하며
dx, dy로 시작위치를 지정하면 된다.
[예제결과화면]
다음은 패키지를 이용한 간단한 예제이다.
import 'package:flutter/material.dart';
import 'package:floating_draggable_widget/floating_draggable_widget.dart';

void main() {
  runApp(const MyApp());
}

class MyApp extends StatelessWidget {
  const MyApp({Key? key}) : super(key: key);

  // This widget is the root of your application.
  @override
  Widget build(BuildContext context) {
    return MaterialApp(
      title: 'Flutter Demo',
      theme: ThemeData(
        primarySwatch: Colors.blue,
      ),
      home: const MyHomePage(title: 'Flutter Demo Home Page'),
    );
  }
}

class MyHomePage extends StatefulWidget {
  const MyHomePage({Key? key, required this.title}) : super(key: key);

  final String title;

  @override
  State<MyHomePage> createState() => _MyHomePageState();
}

class _MyHomePageState extends State<MyHomePage> {
  @override
  Widget build(BuildContext context) {
    return FloatingDraggableWidget(
        child: Scaffold(
          appBar: AppBar(
            title: Text(widget.title),
          ),
          body: Center(
            child: Column(
              mainAxisAlignment: MainAxisAlignment.center,
              children: <Widget>[
                const Text(
                  'Drag floating widget 예제',
                )
              ],
            ),
          ),
        ),
        floatingWidget: Container(
          decoration:
              BoxDecoration(color: Colors.orange, shape: BoxShape.circle),
          child: Center(
            child: Text("😀",
                style: TextStyle(fontSize: 30), textAlign: TextAlign.center),
          ),
        ),
        floatingWidgetHeight: 70,
        floatingWidgetWidth: 70,
        dx: 100,
        dy: 100);
  }
}
'Source code or Tip > Flutter & Dart' 카테고리의 다른 글
| [Flutter] BottomNavitaionBar에서 backkey처리( WillPopScope ) (0) | 2022.07.21 |
|---|---|
| [Flutter] BottomNavitaionBar에서 화면이동시 코드실행(화면갱신) (0) | 2022.07.20 |
| [Flutter] LimitedBox 예제 - 최대크기를 고정한 스크롤 화면 (0) | 2022.07.13 |
| [Flutter] 기초 - 화면끼리 데이터 전달(반환) 예제 (0) | 2022.07.11 |
| [Dart] dart webserver - shelf (0) | 2022.07.11 |
'Source code or Tip/Flutter & Dart' Related Articles
more


Comments