| 일 | 월 | 화 | 수 | 목 | 금 | 토 |
|---|---|---|---|---|---|---|
| 1 | 2 | 3 | 4 | 5 | 6 | 7 |
| 8 | 9 | 10 | 11 | 12 | 13 | 14 |
| 15 | 16 | 17 | 18 | 19 | 20 | 21 |
| 22 | 23 | 24 | 25 | 26 | 27 | 28 |
Tags
- 파이썬
- 좋은글필사하기
- Freesound
- 공부집중
- 명심보감
- Android
- 소울칼리버6
- jetpack compose
- 명상명언
- androidx
- Gemini
- 장자명언
- 코틀린
- javascript
- Flutter
- 명언
- ASMR
- Linux
- 명언모음
- FSM
- Firebase
- gemini-cli
- kotlin
- Coroutine
- ChatGPT
- 이모지메모
- 생성AI
- 오픈소스
- 오늘의역사
- DART
Archives
- Today
- Total
Vintage appMaker의 Tech Blog
[Flutter] Dio, retrofit을 이용한 github API 예제 본문
Source code or Tip/Flutter & Dart
[Flutter] Dio, retrofit을 이용한 github API 예제
VintageappMaker 2022. 5. 23. 10:33Flutter로 통신시, 기본적인 http 모듈을 사용해도 되지만 방대한 Data 구조를 처리해야 할 경우는 직렬화의 필요성을 느끼게 된다. 그래서 Android에서 보편적으로 사용하고 있는 retrofit을 Flutter에서도 사용하게 된다.
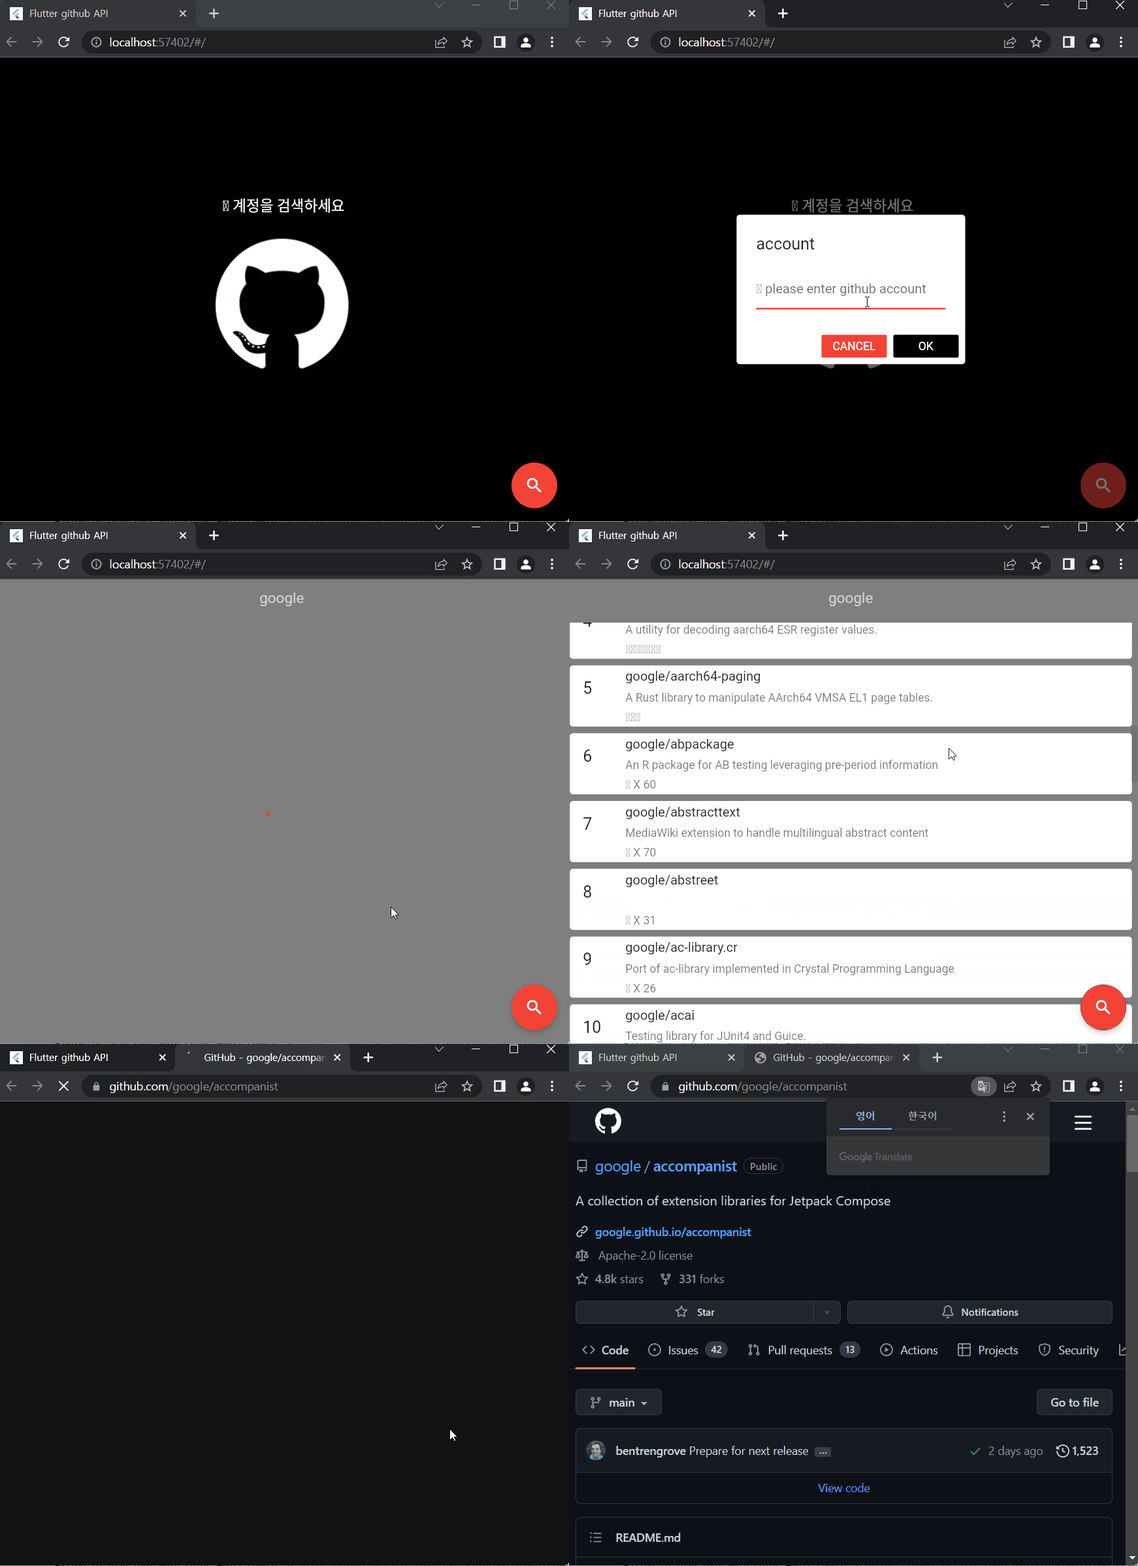
다음은 Flutter에서 retrofit을 사용하는 예제이다.
GitHub - VintageAppMaker/githubflutter: init
init. Contribute to VintageAppMaker/githubflutter development by creating an account on GitHub.
github.com
참고해야 할 것은
Android에서 Retrofit은 @어노테이션만 선언하면 자동으로 코드를 만들어주지만, flutter에서는 수동으로 콘솔 명령어를 입력 후, 코드생성을 해야하는 번거로움이 있다.
// @RestApi(baseUrl: "")가 정의된 파일에서 시작....
// <= 레트로핏 Interface 정의파일 (예제에서는 RestClient.dart)

// 0. 참고사이트(레트로핏, dio)
// https://pub.dev/packages/retrofit
// https://pub.dev/packages/dio

1. retrofit API가 선언된 파일(이곳)에서 데이터 정의
정의 시 @JsonSerializable()으로 선언하고
데이터를 정의하며

직렬화에 필요한
fromJson(), fromJson() 함수를 같이 선언 후,
[파일명.g.dart]에서 생성된 값으로 대입하는 방법으로 구현한다.

// ex)
@JsonSerializable()
class User {
  String? login;
  int? repos;
  int? gists;
  int? followers;
  int? following;
  String? bio;
  String? avatar_url;

  User({this.login, this.repos, this.gists, this.followers});

  // serialization을 위한 함수
  factory User.fromJson(Map<String, dynamic> json) => _$UserFromJson(json);
  Map<String, dynamic> Function(User instance) toJson() => _$UserToJson;

}

대입시 넣는 함수는 _$함수명으로 한다.
아직 [파일명.g.dart]이 생성되지 않았기에
개발환경에서는 존재하지 않아 에러를 발생할 것이지만 무시한다.

2. retrofit 제너레이트 코드를 사용하기 위해
part '파일명.g.dart'를 수동으로 정의한다.

3. 터미널에서 실행
flutter pub run build_runner build

4. 빌드가 된 후에는 파일명.g.dart가 생성되어 에러가 발생하지 않을 것이다.
그리고 이대로 사용해도 되지만, 정의된 데이터를 따로 파일로 관리하는 것이 편리하다.
단, fromJson(), fromJson() 함수를 정의한 내용을 [파일명.g.dart]에서
가져와서 데이터가 정의된 같은 파일내에서 기술해야 한다. 


web 예제(웹에서 실행) - 인증키 없으므로 실행제한 있음
http://vintageappmaker.com/apps/github/#/
githubflutter
vintageappmaker.com
'Source code or Tip > Flutter & Dart' 카테고리의 다른 글
| [dart] List를 이용한 Function table 활용 - case & 순차적 함수처리 (0) | 2022.06.16 |
|---|---|
| [Flutter] keyboard 위에 TextField 노출시키기 (0) | 2022.06.08 |
| [링크모음] Flutter 3.0 & Dart 2.17 달라진 점 (0) | 2022.05.18 |
| [링크모음] Flutter - Unit test를 위한 integration test package (0) | 2022.03.19 |
| [Flutter Deskop] 괜찮은 Flutter desktop github (0) | 2021.12.18 |
Comments


