
| 일 | 월 | 화 | 수 | 목 | 금 | 토 |
|---|---|---|---|---|---|---|
| 1 | 2 | 3 | 4 | 5 | 6 | |
| 7 | 8 | 9 | 10 | 11 | 12 | 13 |
| 14 | 15 | 16 | 17 | 18 | 19 | 20 |
| 21 | 22 | 23 | 24 | 25 | 26 | 27 |
| 28 | 29 | 30 | 31 |
Tags
- 코틀린
- 벤자민플랭클린
- 공부집중
- jetpack compose
- 1인개발자
- 명언모음
- Freesound
- Streaming
- 공자명언
- androidx
- 오픈소스
- bash
- kotlin
- 좋은글필사하기
- recyclerview
- DART
- Coroutine
- 넷플릭스
- Android
- Flutter
- Linux
- 이모지메모
- 명심보감
- 파이썬
- Firebase
- 소울칼리버6
- 이모지
- ASMR
- FSM
- 장자명언
Archives
- Today
- Total
Vintage appMaker의 Tech Blog
[예제] Kotlin에서 Spinner 커스텀 본문
Source code or Tip/Android(Java, Kotlin)
[예제] Kotlin에서 Spinner 커스텀
VintageappMaker 2021. 5. 12. 22:55Android에서 앱을 만들다보면
- Button
- TextEdit
- TextView
다음으로 Spinner를 커스텀해야 할 때가 많다. 그런데 위의 3개와는 달리 Spinner를 커스텀 할 때에는 해야할 일들이 많다. 일반적으로
1. Spinner 배경설정
2. Adapter 만들기
3. Adapter의 getView에서 처리
4. Spinner에 adapter 설정하기
순서로 처리한다.
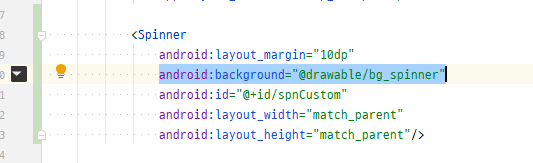
1. Spinner 배경설정
Spiner의 backgroud에 drawable한 XML을 설정한다.
■ bg_spinner.xml
<?xml version="1.0" encoding="utf-8"?>
<layer-list xmlns:android="http://schemas.android.com/apk/res/android">
    <item>
        <shape android:shape="rectangle">
            <solid android:color="#333333"/>
            <corners android:radius="3dp" />
        </shape>
    </item>
    <item android:gravity="center_vertical|right" android:right="8dp">
        <layer-list>
            <item android:width="12dp" android:height="12dp"  android:gravity="center" android:bottom="10dp">
                <rotate
                    android:fromDegrees="45"
                    android:toDegrees="45">
                    <shape android:shape="rectangle">
                        <solid android:color="#eeeeee" />
                        <stroke android:color="#eeeeee" android:width="1dp"/>
                    </shape>
                </rotate>
            </item>
            <item android:width="20dp" android:height="11dp" android:bottom="21dp" android:gravity="center">
                <shape android:shape="rectangle">
                    <solid android:color="#333333"/>
                </shape>
            </item>
        </layer-list>
    </item>
</layer-list>
■ custom_spinner_item1.xml
<?xml version="1.0" encoding="utf-8"?>
<LinearLayout
    xmlns:android="http://schemas.android.com/apk/res/android"
    android:orientation="vertical"
    android:layout_width="match_parent"
    android:layout_height="wrap_content">

    <TextView
        android:id="@+id/text_first"
        android:layout_width="match_parent"
        android:layout_height="40dp"
        android:background="#333333"
        android:ellipsize="marquee"
        android:gravity="left|center_vertical"
        android:minWidth="130dp"
        android:paddingStart="20dp"
        android:singleLine="true"
        android:textColor="#eeeeee"
        android:textSize="12dp" />

</LinearLayout>
2. Adapter 만들기
Spinner에서 사용할 Custom Adapter를 만들어 설정해야 한다. Kotlin의 경우, 확장함수를 지원하므로 이를 이용하면
범용적으로 편리하게 사용할 수 있다.
fun View.dpToPx(dp: Float): Int = context.dpToPx(dp)
fun Context.dpToPx(dp: Float): Int = TypedValue.applyDimension(TypedValue.COMPLEX_UNIT_DIP, dp, resources.displayMetrics).toInt()
fun View.setHeight(context : Context, value: Int) {
    val lp = layoutParams
    lp?.let {
        lp.height = dpToPx(value.toFloat())
        layoutParams = lp
    }
}

fun Spinner.setCustomAdapter(context : Context, lst : MutableList<String>, unselectedTitle : String = "" ){
    class CustomSpnAdapter : BaseAdapter {
        var lst : MutableList<String> = mutableListOf<String>()
        var context : Context
        var unselectedTitle : String

        constructor (context: Context, lst: MutableList<String>, unselectedTitle: String){
            this.context = context
            this.lst     = lst
            this.unselectedTitle = unselectedTitle
        }

        override fun getCount(): Int {
            return lst.size
        }

        override fun getItemId(p0: Int): Long {
            return 0
        }

        override fun getItem(n: Int): String {
            return lst[n]
        }

        override fun getView(n: Int, p1: View?, p2: ViewGroup?): View {
            val v = LayoutInflater.from(context).inflate(R.layout.custom_spinner_item1, null)
            v.findViewById<TextView>(R.id.text_first)?.apply {
                text = lst[n]


                // ** 이 부분을 처리하지 않으면
                // ** spinner background가 커스텀 item으로 치환된다.
                // ** XML에서도 background를 같게 지정해주어야 한다.
                if(p2 is Spinner){

                    background = context.getDrawable(R.drawable.bg_spinner)
                    if(p2.selectedItemPosition < 0 ){
                        p2.setHeight(context, 40)
                        setTextColor(Color.parseColor("#626466"))
                        text = unselectedTitle
                    }
                }
            }
            return v
        }
    }

    adapter = CustomSpnAdapter(context, lst, unselectedTitle)
    this.setSelection(-1)
}
3. getView 처리하기
인덱스에 따라 보여줄 View를 만들어 반환시킨다. 여기에서 ViewGroup형 변수는 팝업으로 보여줄 것인지, Spinner에서 직접보여줄 것인지를 판단할 수 있다. 그러므로 선택 후, Spinner 위젯을 바꾸고 싶다면 ViewGroup형 변수가 Spinner형인지 비교하여 처리하면 된다.
4. getView 처리하기.
Kotlin의 확장함수를 사용했다면 다음과 같이 간단하게 사용할 수 있다.
...

val spn = findViewById<Spinner>(R.id.spnCustom)
spn.setCustomAdapter(this, mutableListOf("1", "2", "3", "4"))

...
그러면 다음과 같이 사용할 수 있다.

'Source code or Tip > Android(Java, Kotlin)' 카테고리의 다른 글
| 화면 회전시 Layout 변경 (0) | 2021.05.22 |
|---|---|
| [kotlin] Coroutine 취소방법 - Job을 이용한 2가지 (0) | 2021.05.17 |
| Android Studio 이전버전 받기 (0) | 2021.05.07 |
| [kotlin] 예외처리 간소화 (0) | 2021.05.06 |
| [github] Pixabay Open API를 이용한 이미지 검색 (0) | 2021.04.13 |
'Source code or Tip/Android(Java, Kotlin)' Related Articles
more


Comments